Photoshop�OӋ����ȼ��ˇ�g�ֽ̡̳�Ӣ��(2)
����Դ�� Tutsplus�����x���� Rose �o�҂����������ʵ����£�4. How to Create a Texture Overlay Layer
Step 1
Create a new layer on top of the Stroke Flames layer, name it Flame Texture, and fill it with White.
Make sure to set the Foreground and Background Colors to Black and White.
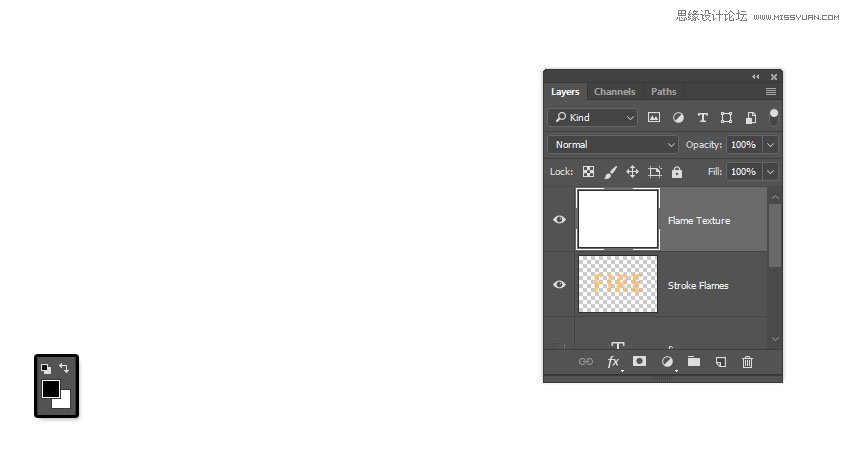
Step 2
Right-click the Flame Texture layer and choose Convert to Smart Object.

Step 3
Right-click the Flame Texture layer again and choose Create Clipping Mask.

Step 4
Go to Filter > Render > Clouds.

5. How to Create a Texture Using Filters
Step 1
Go to Filter > Filter Gallery to apply the following Filters:
Sketch > Bas Relief
Detail: 13
Smoothness: 3
Light: Bottom

Step 2
Click the New effect layer icon in the bottom right corner to add another filter, and apply Bas Relief with the same values again.

Step 3
Add another new effect layer.
Brush Strokes > Spatter
Spray Radius: 10
Smoothness: 5
Click OK when done.

 ���㲻Ҫ��
-
 Photoshop�������L�������ƬЧ����Ӣ��2018-04-23
-
 Photoshop�ϳ��L����������L�i¹��Ӣ��2018-04-23
-
 Photoshop�ϳɱ�����Ч�Ľ��~������Ӣ��2018-02-10
-
 Photoshop�ϳɉ����L���ɭ�ֈ�����Ӣ��2018-02-10
-
 Photoshop�ϳ�����ʩ��������Ӣ��2018-02-10
-
 Photoshop���������|�е�3D���w�֡�Ӣ��2018-01-09
-
 Photoshop�OӋ����ȼ��ˇ�g�ֽ̡̳�Ӣ��2018-01-09
-
 Photoshop�����Ż���M�ɵ�ˇ�g�֡�Ӣ��
���P����3802018-01-09
Photoshop�����Ż���M�ɵ�ˇ�g�֡�Ӣ��
���P����3802018-01-09
-
 Photoshop����ë����ʥ�Q�����w��Ӣ��
���P����8882017-12-16
Photoshop����ë����ʥ�Q�����w��Ӣ��
���P����8882017-12-16
-
 Photoshop�ϳɄ����Ӣ�ۑ����̡̳�Ӣ��
���P����5802017-12-12
Photoshop�ϳɄ����Ӣ�ۑ����̡̳�Ӣ��
���P����5802017-12-12
