Photoshop�ϳɱ�������ס��Ů����Ӣ��(4)
����Դ�� photoshoptutorials�����x���� ANTAKA NGUYEN �o�҂����������ʵ����£�Step 14
Apply following adjustment layers to the dead tree.
Brightness/Contrast -> Exposure -> Photo Filter


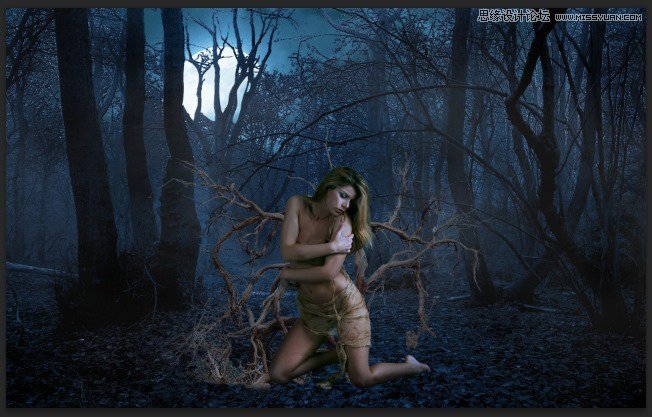
Here is the result
Step 15
Open the Dead Tree 2 and extract the following part

Place it behind the model.

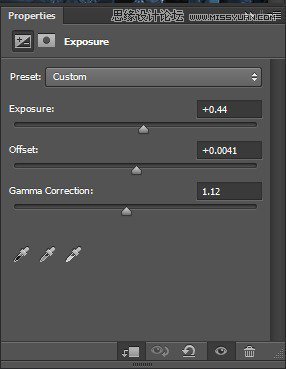
Add an Exposure adjustment layer
And we have some extra dead tree for the girl!

Step 16
This is a very interesting step and I recommend you try it out by your free will. We will make the model being tangled by the dead tree’s branches. Open the Dead Tree 1 stock again and get any piece of branch you want. For example this one

Paste it to our document, right click on its layer and choose Convert To Smart Object, by this way we can transform the branch freely without fearing the quality reduction.
Now you can bend, twist the branch at your free will. Hit Ctrl + T to bring up the Transform tool, right click to choose the option. In this picture I use Warp to bend the branch.

Continue duplicate and bend the branches. Make them twist around the model.

Step 17
Continue creating twisted branches as many as you like, just don’t overdo it.

Create a new layer and paint some shadow to the part which the branches are on the model. Change the Blend Mode to Overlay.

 ���㲻Ҫ��
-
 Photoshop�������L�������ƬЧ����Ӣ��2018-04-23
-
 Photoshop�ϳ��L����������L�i¹��Ӣ��2018-04-23
-
 Photoshop�ϳɱ�����Ч�Ľ��~������Ӣ��2018-02-10
-
 Photoshop�ϳɉ����L���ɭ�ֈ�����Ӣ��2018-02-10
-
 Photoshop�ϳ�����ʩ��������Ӣ��2018-02-10
-
 Photoshop���������|�е�3D���w�֡�Ӣ��2018-01-09
-
 Photoshop�OӋ����ȼ��ˇ�g�ֽ̡̳�Ӣ��2018-01-09
-
Photoshop�������L�������ƬЧ����Ӣ��
���P����11882018-04-23
-
Photoshop�ϳ��L����������L�i¹��Ӣ��
���P����13832018-04-23
-
Photoshop�ϳɱ�����Ч�Ľ��~������Ӣ��
���P����34052018-02-10
-
 Photoshop�����S���|�����w�֡�Ӣ��
���P����7422018-02-10
Photoshop�����S���|�����w�֡�Ӣ��
���P����7422018-02-10
-
 Photoshop�����@�G����3D���w��
���P����14682018-02-10
Photoshop�����@�G����3D���w��
���P����14682018-02-10
-
Photoshop�ϳɉ����L���ɭ�ֈ�����Ӣ��
���P����24492018-02-10
-
Photoshop�ϳ�����ʩ��������Ӣ��
���P����8372018-02-10
-
 Photoshop�������p���ع����w
���P����6532018-01-09
Photoshop�������p���ع����w
���P����6532018-01-09
