Photoshop�ϳɱ�������ס��Ů����Ӣ��(7)
����Դ�� photoshoptutorials�����x���� ANTAKA NGUYEN �o�҂����������ʵ����£�Step 28
We would want to add an extra light to increase the effect we just made. Use a soft brush with color #6bb6fd and paint around the model, change the Blend Mode to Linear Dodge and Opacity 40%

Step 29
Open the Ivy stock again and place it at the top left of the image. Apply a 1,6px Gaussian Blur.

Duplicate the ivy, resize it a little bit and place it behind the original ivy.

Group those ivy layers into a group and apply this Brightness/Contrast :

Done with the left!

Step 30
Now we just need to make one more ivy set at the right, duplicate the Ivy group we just created and place them to the right. Ctrl + T to open Transform Tool and choose Flip Horizontal so the ivies doesn’t look similar to the left one.

Step 31
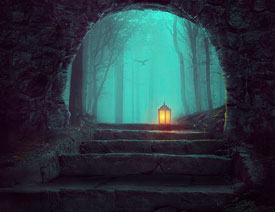
We are almost done! Add some more fog to increase the mystic atmosphere for our piece.

Layer mask to the fog.

Here is the result.

Step 32
Now one the Ray Light brush, piece a brush you like and place it near the moon. Low down the Opacity if you feel the light is too much.

Step 33
Now to the final color tune up. This following chain of adjustment layer will do its magic!
Hue/Saturation -> Exposure -> Brightness/Contrast -> Curves -> Selective Color


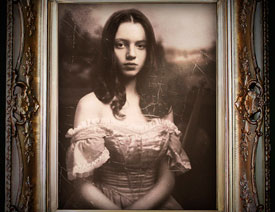
The result :

Step 34
Add some extra light to the model with a White soft brush.

 ���㲻Ҫ��
-
 Photoshop�������L�������ƬЧ����Ӣ��2018-04-23
-
 Photoshop�ϳ��L����������L�i¹��Ӣ��2018-04-23
-
 Photoshop�ϳɱ�����Ч�Ľ��~������Ӣ��2018-02-10
-
 Photoshop�ϳɉ����L���ɭ�ֈ�����Ӣ��2018-02-10
-
 Photoshop�ϳ�����ʩ��������Ӣ��2018-02-10
-
 Photoshop���������|�е�3D���w�֡�Ӣ��2018-01-09
-
 Photoshop�OӋ����ȼ��ˇ�g�ֽ̡̳�Ӣ��2018-01-09
-
Photoshop�������L�������ƬЧ����Ӣ��
���P����11882018-04-23
-
Photoshop�ϳ��L����������L�i¹��Ӣ��
���P����13832018-04-23
-
Photoshop�ϳɱ�����Ч�Ľ��~������Ӣ��
���P����34052018-02-10
-
 Photoshop�����S���|�����w�֡�Ӣ��
���P����7422018-02-10
Photoshop�����S���|�����w�֡�Ӣ��
���P����7422018-02-10
-
 Photoshop�����@�G����3D���w��
���P����14682018-02-10
Photoshop�����@�G����3D���w��
���P����14682018-02-10
-
Photoshop�ϳɉ����L���ɭ�ֈ�����Ӣ��
���P����24492018-02-10
-
Photoshop�ϳ�����ʩ��������Ӣ��
���P����8372018-02-10
-
 Photoshop�������p���ع����w
���P����6532018-01-09
Photoshop�������p���ع����w
���P����6532018-01-09
