Photoshop�������L�������ƬЧ����Ӣ��(5)
����Դ�� վ�������x���� Melody Nieves �o�҂����������ʵ����£�Step 3
Before we add the vignette, let's create a shadow for the picture frame.
Right-click the picture frame layer and go to Blending Options. Create a Drop Shadow with the following settings.

Advertisement
Step 4
Let's finish with a vignette effect for more drama. This will help blend the overall picture frame with the original green background.
Create a New Layer above all the others.
Select the Gradient Tool (G) and set it to the Foreground Color to Transparent option. Now create a Reflected Linear Gradient using a dark gray color #282828. Set the Layer Blend Mode to Multiply and lower the Opacity to 88%.
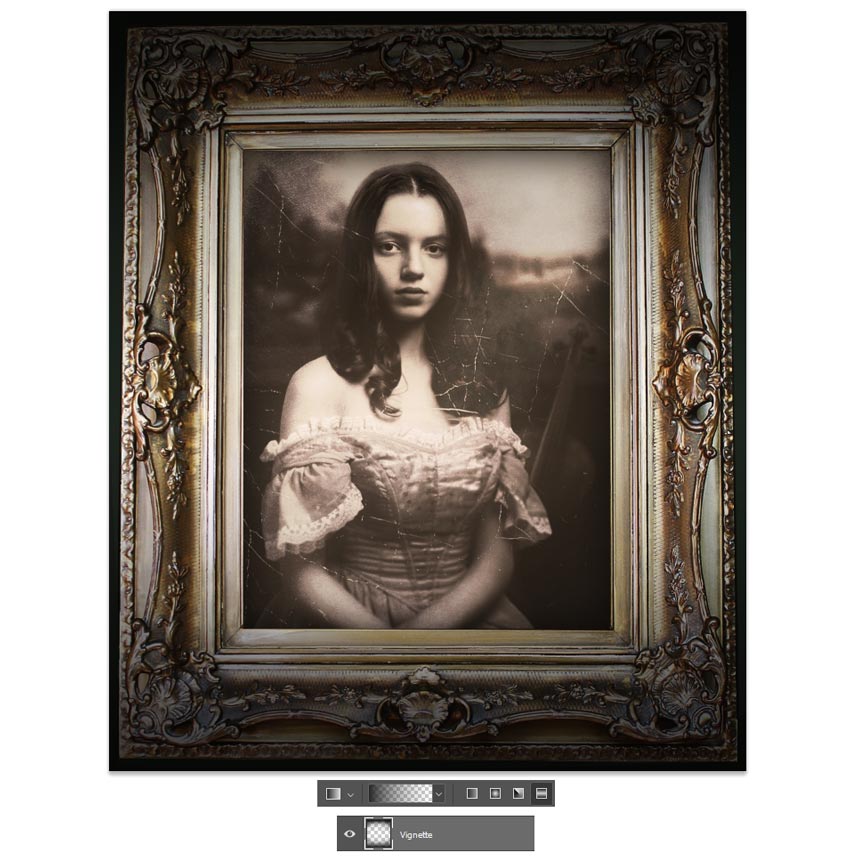
Feel free to add even more shadow on another New Layer. Use a Soft Round Brush (0% Hardness/10-30% Opacity) to paint more dark shadow along the edges for a rounder appearance.
I've also used this layer to paint subtle white scratches onto the picture for even more aging.

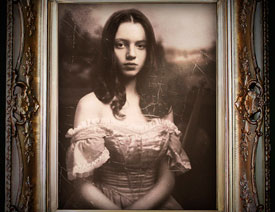
Be sure to check out the final result below!
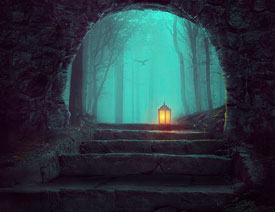
And for more even fun, see how your manipulation would look hanging up on the wall. Here I used this Interior Room image from Envato Elements to try this look out.

Melody Nieves

 ��ǵ���
-
 Photoshop�������L�������ƬЧ����Ӣ��2018-04-23
-
 Photoshop�ϳ��L����������L�i¹��Ӣ��2018-04-23
-
 Photoshop�ϳɱ�����Ч�Ľ��~������Ӣ��2018-02-10
-
 Photoshop�ϳɉ����L���ɭ�ֈ�����Ӣ��2018-02-10
-
 Photoshop�ϳ�����ʩ��������Ӣ��2018-02-10
-
 Photoshop���������|�е�3D���w�֡�Ӣ��2018-01-09
-
 Photoshop�OӋ����ȼ��ˇ�g�ֽ̡̳�Ӣ��2018-01-09
-
 Photoshop�����S���|�����w�֡�Ӣ��
���P����7422018-02-10
Photoshop�����S���|�����w�֡�Ӣ��
���P����7422018-02-10
-
 Photoshop�����@�G����3D���w��
���P����14682018-02-10
Photoshop�����@�G����3D���w��
���P����14682018-02-10
-
Photoshop�ϳɉ����L���ɭ�ֈ�����Ӣ��
���P����24492018-02-10
-
 Photoshop�������p���ع����w
���P����6532018-01-09
Photoshop�������p���ع����w
���P����6532018-01-09
-
 Photoshop����ľ�ذ�LOGO��ӡЧ����Ӣ��
���P����19272018-01-09
Photoshop����ľ�ذ�LOGO��ӡЧ����Ӣ��
���P����19272018-01-09
-
Photoshop���������|�е�3D���w�֡�Ӣ��
���P����4612018-01-09
-
 Photoshop�����Ż���M�ɵ�ˇ�g�֡�Ӣ��
���P����3802018-01-09
Photoshop�����Ż���M�ɵ�ˇ�g�֡�Ӣ��
���P����3802018-01-09
-
 Photoshop�����ɐ۵��ǹ���֡�Ӣ��
���P����6722017-12-25
Photoshop�����ɐ۵��ǹ���֡�Ӣ��
���P����6722017-12-25
